Statping
Statping is a lightweight and easy to install monitoring tool written in Go. It is published under the GNU General Public License v3.0.
Prerequisites
You’ll need your MySQL credentials. Get them with my_print_defaults:
[isabell@stardust ~]$ my_print_defaults client
--default-character-set=utf8mb4
--user=isabell
--password=MySuperSecretPassword
[isabell@stardust ~]$
Create a directory for the configuration.
[isabell@stardust ~]$ mkdir ~/statping
Create a database
[isabell@stardust ~]$ mysql -e "CREATE DATABASE ${USER}_statping"
Installation
Now let’s get started with installing Statping .
Start with cloning the Statping binaries from Github and be sure to replace the version v0.90.74 with the current release number!:
[isabell@stardust ~]$ cd statping
[isabell@stardust statping]$ curl -sL https://github.com/statping/statping/releases/download/v0.90.74/statping-linux-amd64.tar.gz | tar xz
[isabell@stardust statping]$ ls
statping  statping.asc
You can now verify the GPG signature in statping.asc
Setup daemon
Create ~/etc/services.d/statping.ini with the following content:
[program:statping]
directory=%(ENV_HOME)s/statping/
command=%(ENV_HOME)s/statping/statping
autostart=yes
autorestart=yes
After creating the configuration, tell supervisord to refresh its configuration and start the service:
[isabell@stardust ~]$ supervisorctl reread
SERVICE: available
[isabell@stardust ~]$ supervisorctl update
SERVICE: added process group
[isabell@stardust ~]$ supervisorctl status
SERVICE                            RUNNING   pid 26020, uptime 0:03:14
[isabell@stardust ~]$
Configure web server
Note
Statping is running on port 8080.
To make the application accessible from the outside, configure a web backend:
[isabell@stardust ~]$ uberspace web backend set / --http --port <port>
Set backend for / to port <port>; please make sure something is listening!
You can always check the status of your backend using "uberspace web backend list".
[isabell@stardust ~]$
Configuration
You can now access Statping via your browser by visiting <username>.uber.space or any domain you set up.

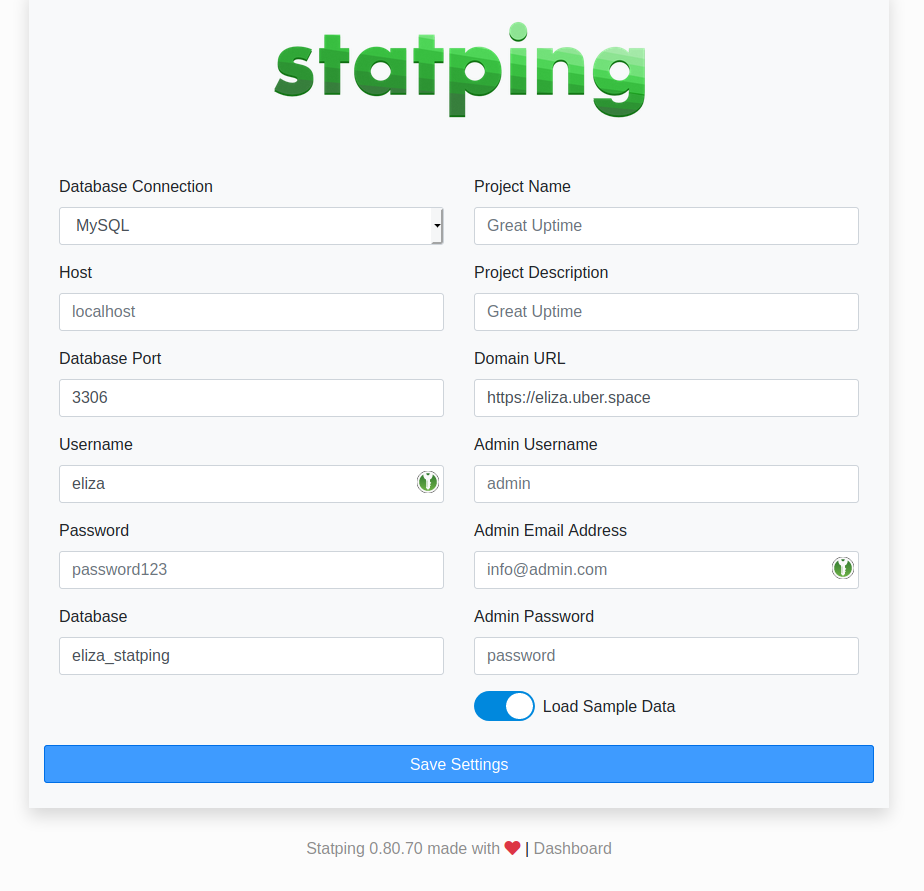
Configuration site of statping.
Select the Database Connection MYSQL and type in your your username and password. The database runs on localhost, the port is 3306.
Also add a Project Name and add your domain <username>.uber.space or any other domain you want to use to reach statping.
Add your E-Mail Address and set a password, then you are good to go. No worries if it takes up to one minute to process your request after clicking Save Settings.
Customization
To configure your dashboard, manage alerts and much more visit yourdomain.tld/dashboard. Log in with the admin account you created. For help an this you should have a look at the Statping Wiki.
Updates
Note
Check the update feed regularly to stay informed about the newest version.
If there is a new version available, you can get the binary with the same command. First you stop the server, then get the new binary. Make sure to replace the version number v0.80.70 with the latest version number you got from the release feed. Now start the service again and check if everything works fine!
[isabell@stardust ~]$ cd ~/statping/
[isabell@stardust statping]$ supervisorctl stop statping
[isabell@stardust statping]$ curl -sL https://github.com/statping/statping/releases/download/v0.80.70/statping-linux-x64.tar.gz | tar xz
[isabell@stardust statping]$ supervisorctl start statping
Tested with Statping v0.80.70 and Uberspace 7.2.4.0
Written by: Moanos <https://hyteck.de/about/>